When I saw this idea I knew I had to try it. I have always wanted to learn how to screen print and even had a little piggy bank to try and save for a small screen printing machine. I have only done a few projects but I thought I would share the process with you, so you can try it too, if you haven't already.
SUPPLIES:
- Freezer Paper (found at grocery store by tinfoil and plastic wrap)
- X-ACTO knife
- Fabric paint
- Paint brush/sponge brush
- Fabric item you want to screen print on
- Image you want to re-create
- Iron
Fabric paint comes in a multitude of colors and different finishes as well, as you can see above.
I have read that Tulip brand works best, but I can not give you a comparison because that is the only brand that I have used so far, but I have had no problems with it so far.
-----------------
Choose an item that you would like to "screen print" something on: a t-shirt, apron, pillow, towel, bag, etc. I would not recommend using a delicate fabric because you will be ironing on the freezer paper and the paint will not adhere as well.
-----------------
Now you will choose the image that you would like to re-create on to the item you have chosen. I would recommend keeping the image simple, a silhouette works best because you will be cutting it out and painting the negative space of the image. You can easily find an image online to use. For this project I simply typed in headphones silhouette and many options will come up (be aware of copyrights) or you can create a design and draw it directly onto the freezer paper yourself.----------------
If you are printing out an image make sure it is the appropriate size and dimensions for the fabric you have chosen. You will then tear off a piece of the freezer paper a bit larger than your image, taping the image underneath the freezer paper, shiny side down and matte side up, so that your image does not shift while you are cutting.....
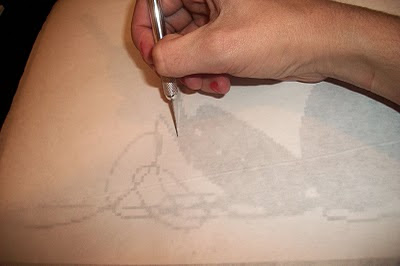
You will be able to see your image through the freezer paper and can cut out the negative space of the image (only the parts that you will want painted on the material) using your X-ACTO knife. You will want to place something under the papers not to destroy the surface on which you are cutting. (I use fun foam)
Once the image is cut out you are now ready to iron on the freezer paper to your fabric. The image below is the part that I discarded (the negative space of my image)
Make sure your material is on a flat surface that you will be ironing on and arrange the freezer paper the way you would like it to look. As you can see below I had to place all the individual pieces in the headphones wire back in the exact spots they belonged. (I used the image above as my template) Once laid out, carefully iron it on so that the shiny side is down and it will adhere nicely to your material. Put the iron on the cotton setting....too cool and it won't stick...too hot and it will curl up on you. The freezer paper should lie flat and be completely stuck to your material around all the edges that you will be painting.
Make sure that you have cardboard or another piece of freezer paper in between any other material so that it does not bleed through. (I used my fun foam)
You are now ready to put the paint on ...

You can put the paint directly onto the fabric and use a brush of some sort make sure that you have an even coat of paint over the entire area or some spots might come out more shiny or raised.
-------------Once painted, allow to dry for 24 hours.
-------------
Once dry you are now ready for the fun part....the reveal.... peel off your paper!!!!
If you have more detailed areas you might need to raise the edges using an object (I find that my X-ACTO knife works great).

BEHOLD......your project is complete!!!

After 48 hours has passed you will want to place a light cloth over the painted area and iron, this will set the paint in so that you can wash it.
ENJOY!!!


